How to Create Jump Servers and Connections with AuthNull’s Windows Agent?
Setting up a Jump Server connection on a Windows machine is a crucial step to ensure secure and efficient communication. AuthNull provides a seamless process to create Jump Servers and establish connections. This guide will walk you through the process using the provided references.
1. Configuring the Endpoint for Jump Server
Before initializing the Jump Server, the endpoint needs to be configured:
- Install the agent on the endpoint.
-
Update the
app.envfile with the following variables:AWS_ACCESS_KEY_ID=xxx AWS_SECRET_ACCESS_KEY=xxx AWS_REGION=us-east-1 BUCKET_NAME=guac-session RECORDING_DIR=/anchor_dvr/ FILE_NAME=test.guac BUCKET_NAME_GCS=gto-did-app-dev STORAGE_AWS_FLAG=true
For detailed instructions on installing and configuring the agent, please refer to the installation guide.
2. Adding Jump Server
Once the endpoint is configured:

- Navigate to the console in Privileged Access Management.
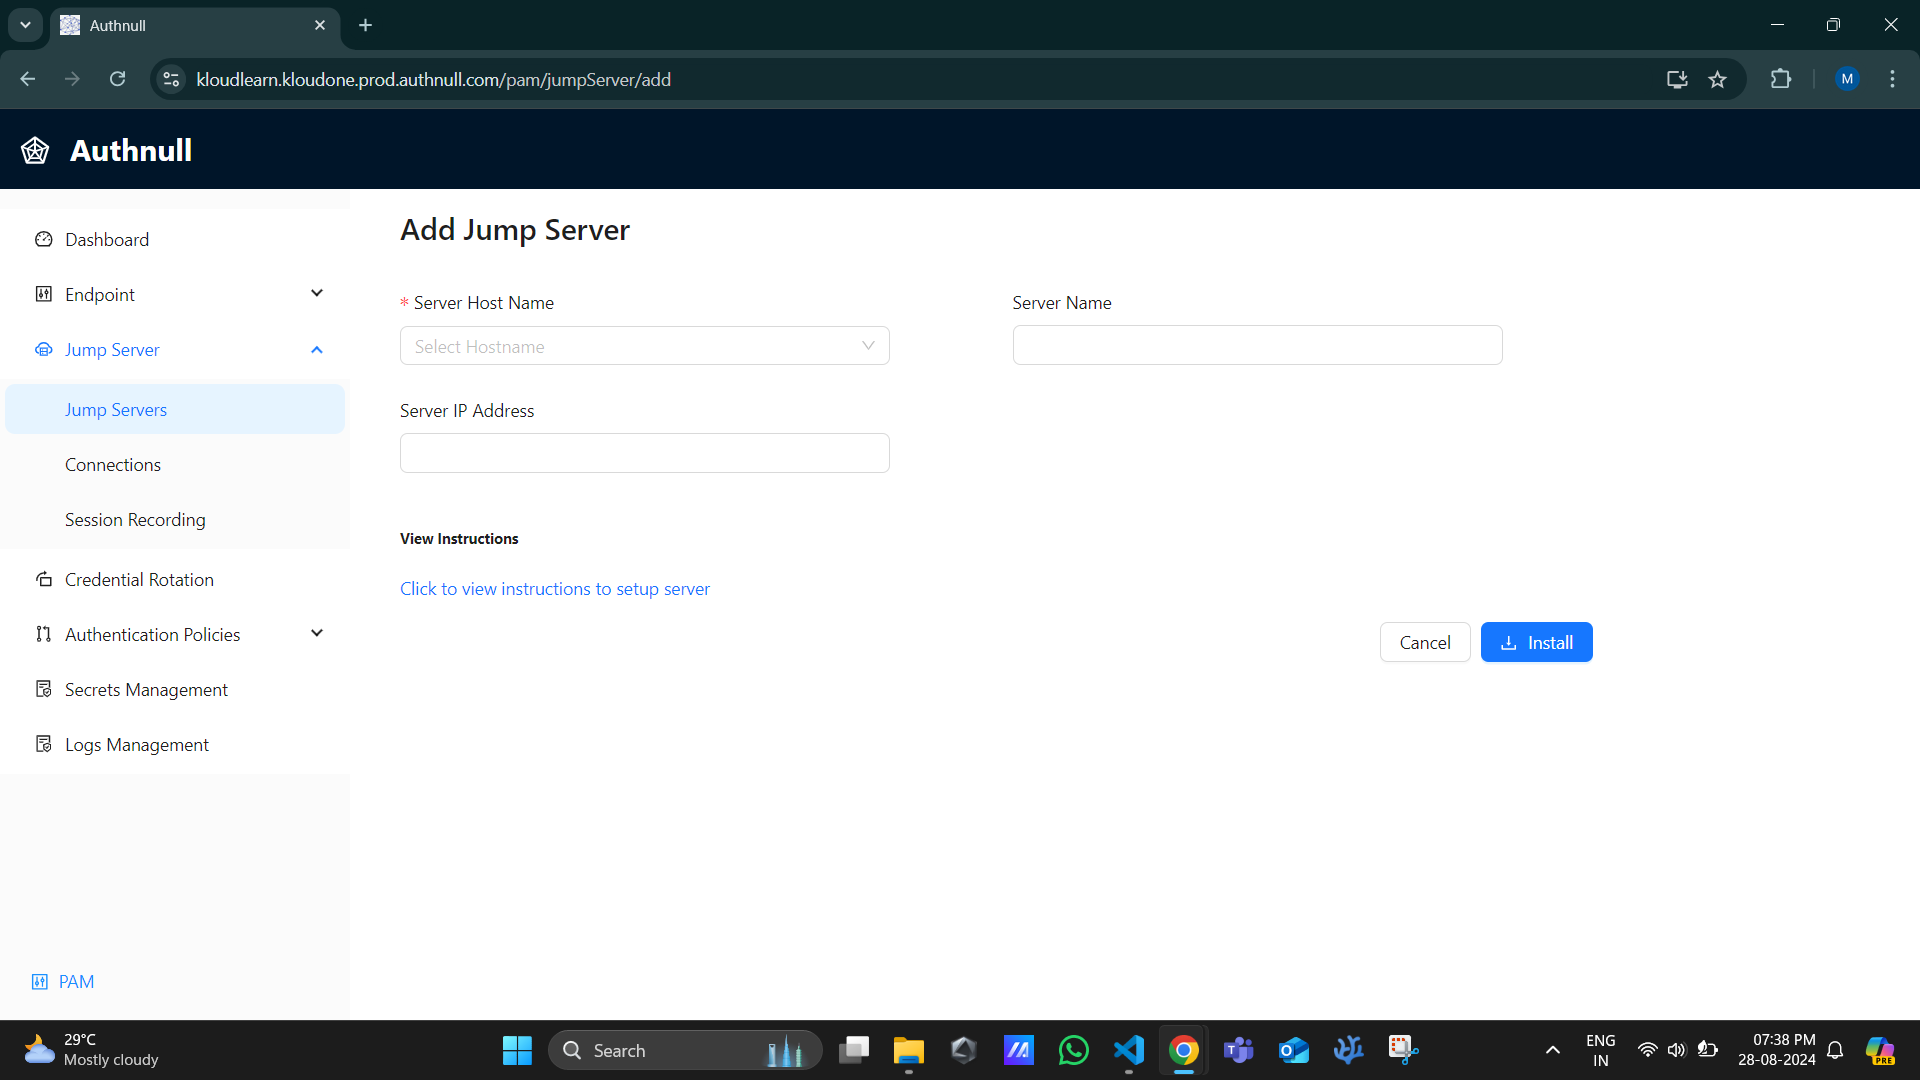
- Click on “Add Jump Server”.
- Fill in the required fields:
- Server Host Name: The hostname where Guacd needs to be installed.
- Server IP Address: Public IP address of the Guacd agent.
- Server Name: Name for the Jump Server.
- Click on “Install”.
Ensure the agent is installed and running on the Endpoint. Once the installation is complete, the Jump Server Agent Status should be active on the Admin Console.
3. Create Connection from a Jump Server
To establish a connection:

- Navigate to the “Connections” from the console.
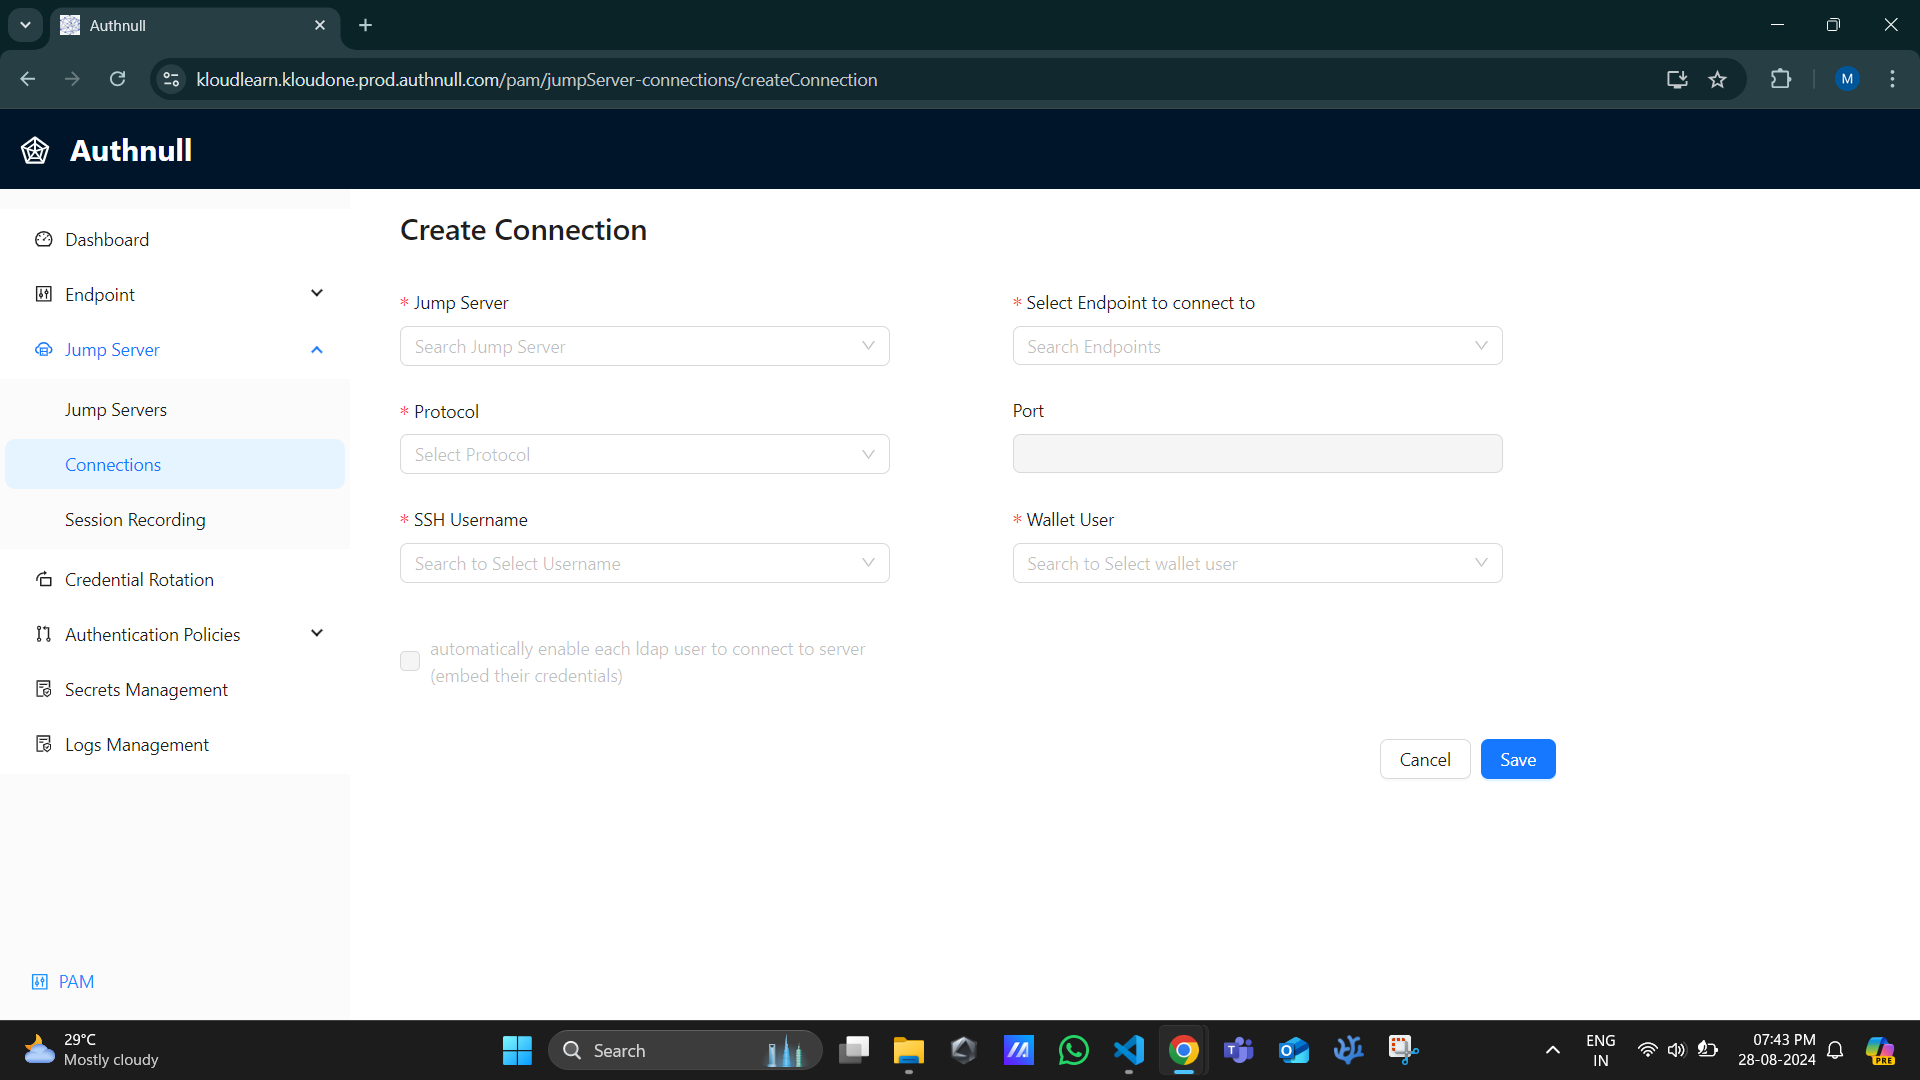
- Click on “Create Connections” in the top right corner.
- Fill in the required fields:
- Jump Server: Select the Jump Server Host.
- Endpoints: The machine to connect with from Jump Server.
- Select Endpoint to connect to: Jump Server IP Address.
- Protocol: select the Protocol
- Port: The port will be preselected
- SSH Username: Select the SSH username
- Wallet User: Select the Wallet User
- Click on “Save”.
After establishing the connection, you can access the VM terminal and execute commands. Once done, exit the machine.
4. Session Recording
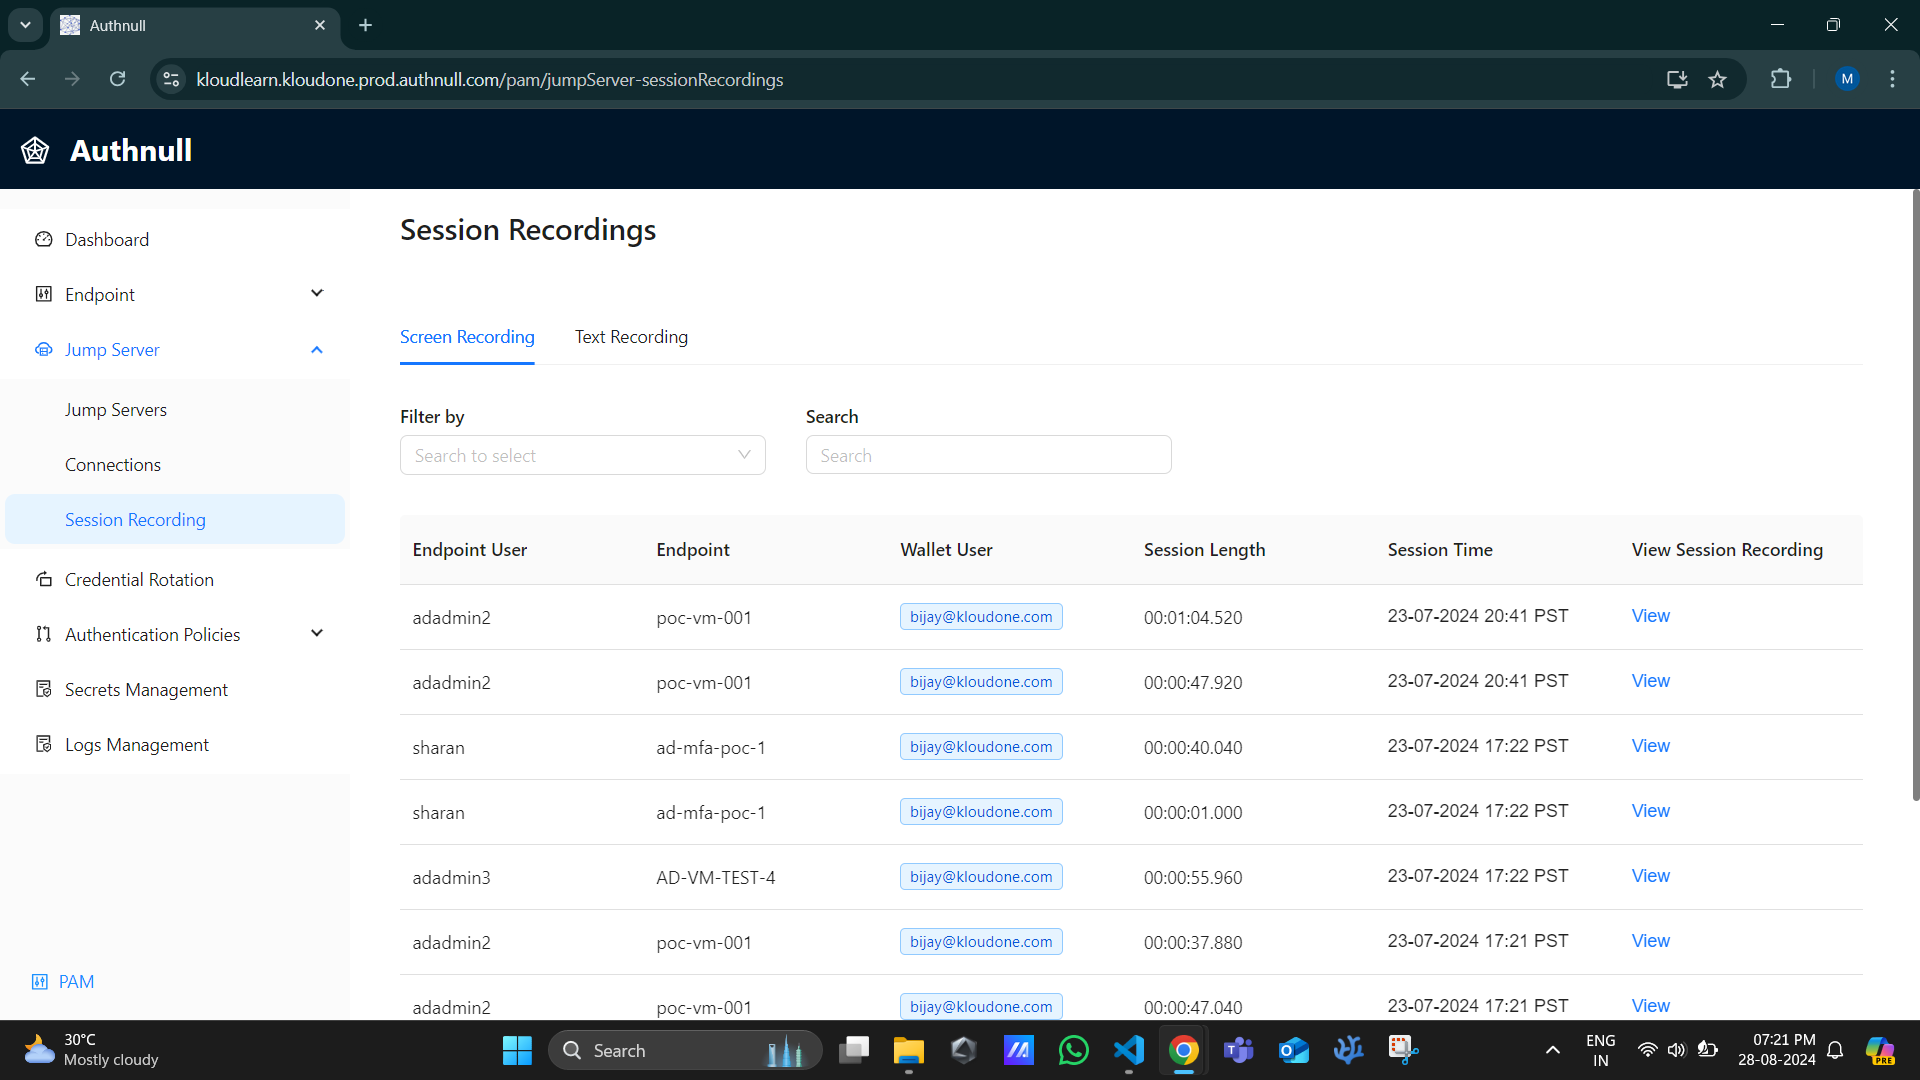
All sessions, including the latest ones, are recorded and can be accessed from the Session Recording page in the Admin Console. The agent will automatically synchronize the sessions in the background.

- Navigate to the Session Recording page.
- View or download the session recordings.
- Text recordings can be viewed under the “Text Recording” page.