AuthNull Active Directory Agent: Integration Guide
The AuthNull Active Directory Agent acts as a secure conduit, seamlessly connecting AuthNull with your Active Directory domain. This integration enhances access management, streamlines user import, and facilitates delegated authentication. This guide outlines the steps to register and configure the AuthNull Active Directory Agent, empowering you to harness its capabilities effectively.
1. Introduction
The AuthNull Active Directory Agent serves as a secure connector, facilitating seamless integration between AuthNull and your Active Directory domain. This bridge empowers AuthNull with user import and delegated authentication capabilities, enhancing your privileged access management strategy.
2. Prerequisites
Before you begin, ensure you have:
- An active AuthNull administrator account.
- Access to your Active Directory domain with appropriate permissions.
3. Registration and Configuration
Navigating to Active Directory Integration

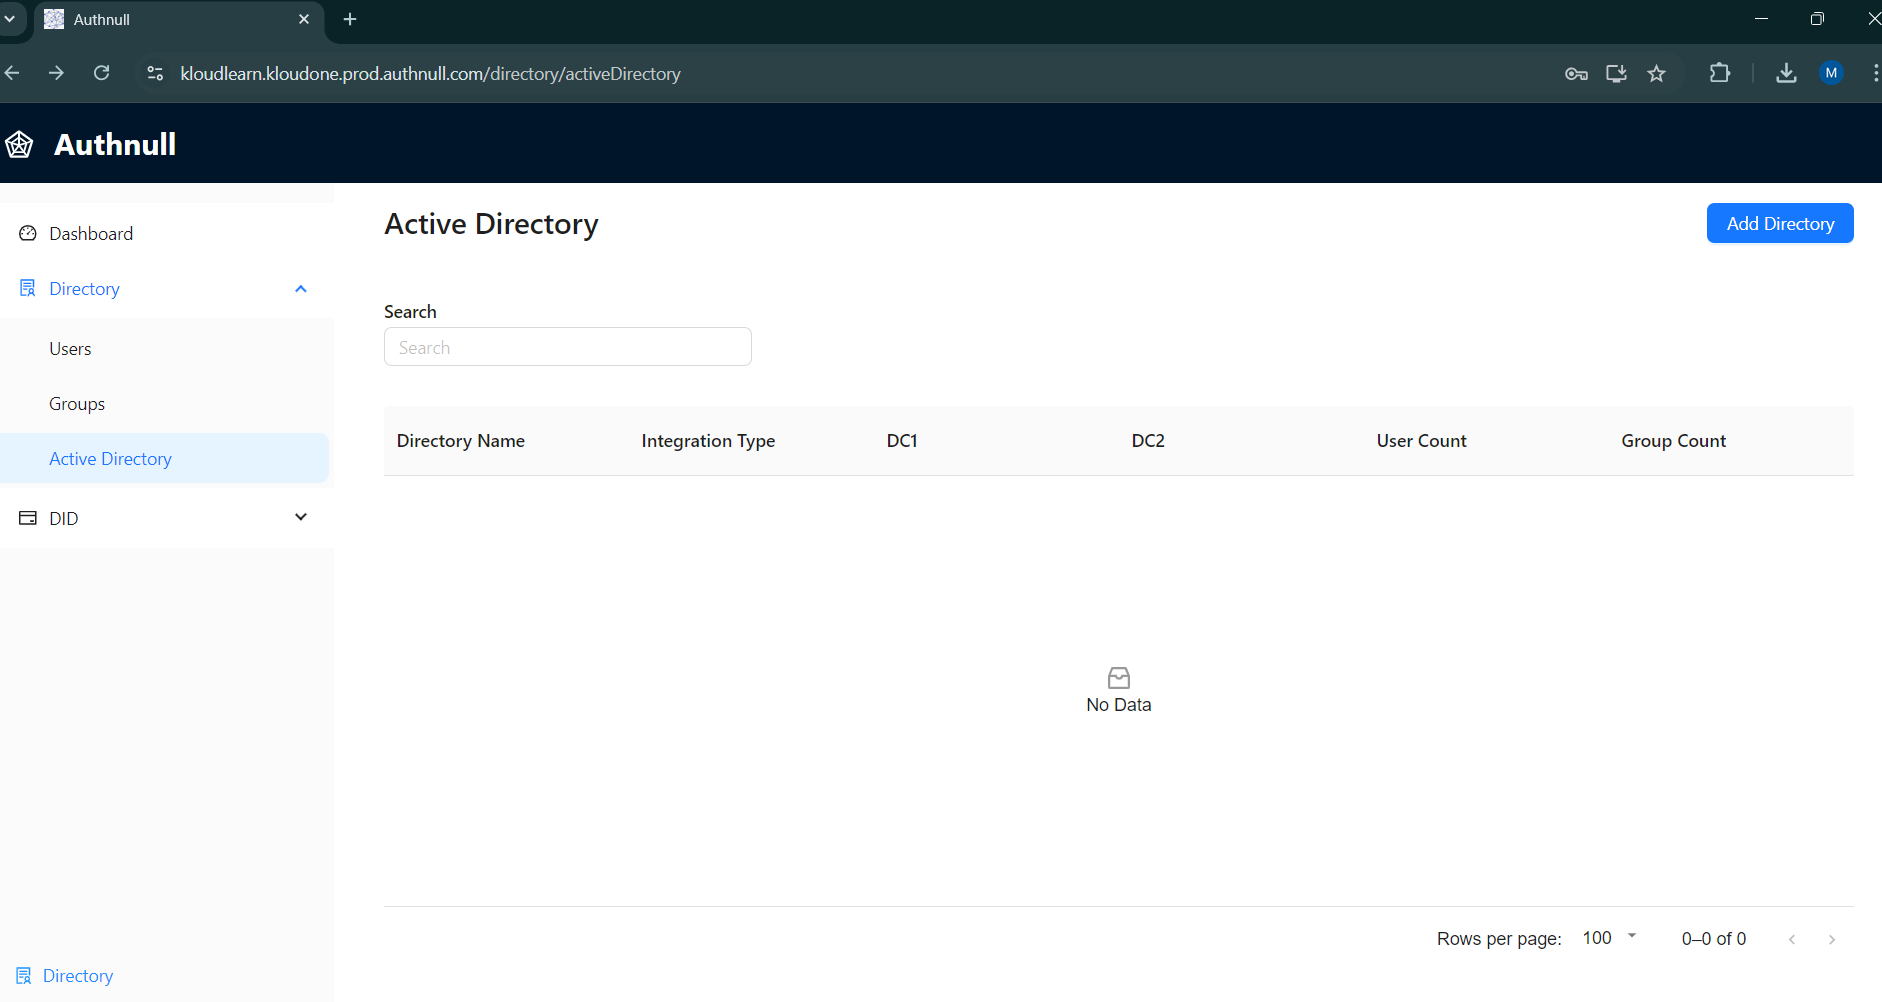
- Log in to the AuthNull dashboard using your administrator credentials.
- Navigate to the ‘Directory’ section.
- Select ‘Active Directory’.
Registering the Active Directory Agent
- Look for the ‘Add Directory’ option in the top right.

- Click to initiate the registration process.

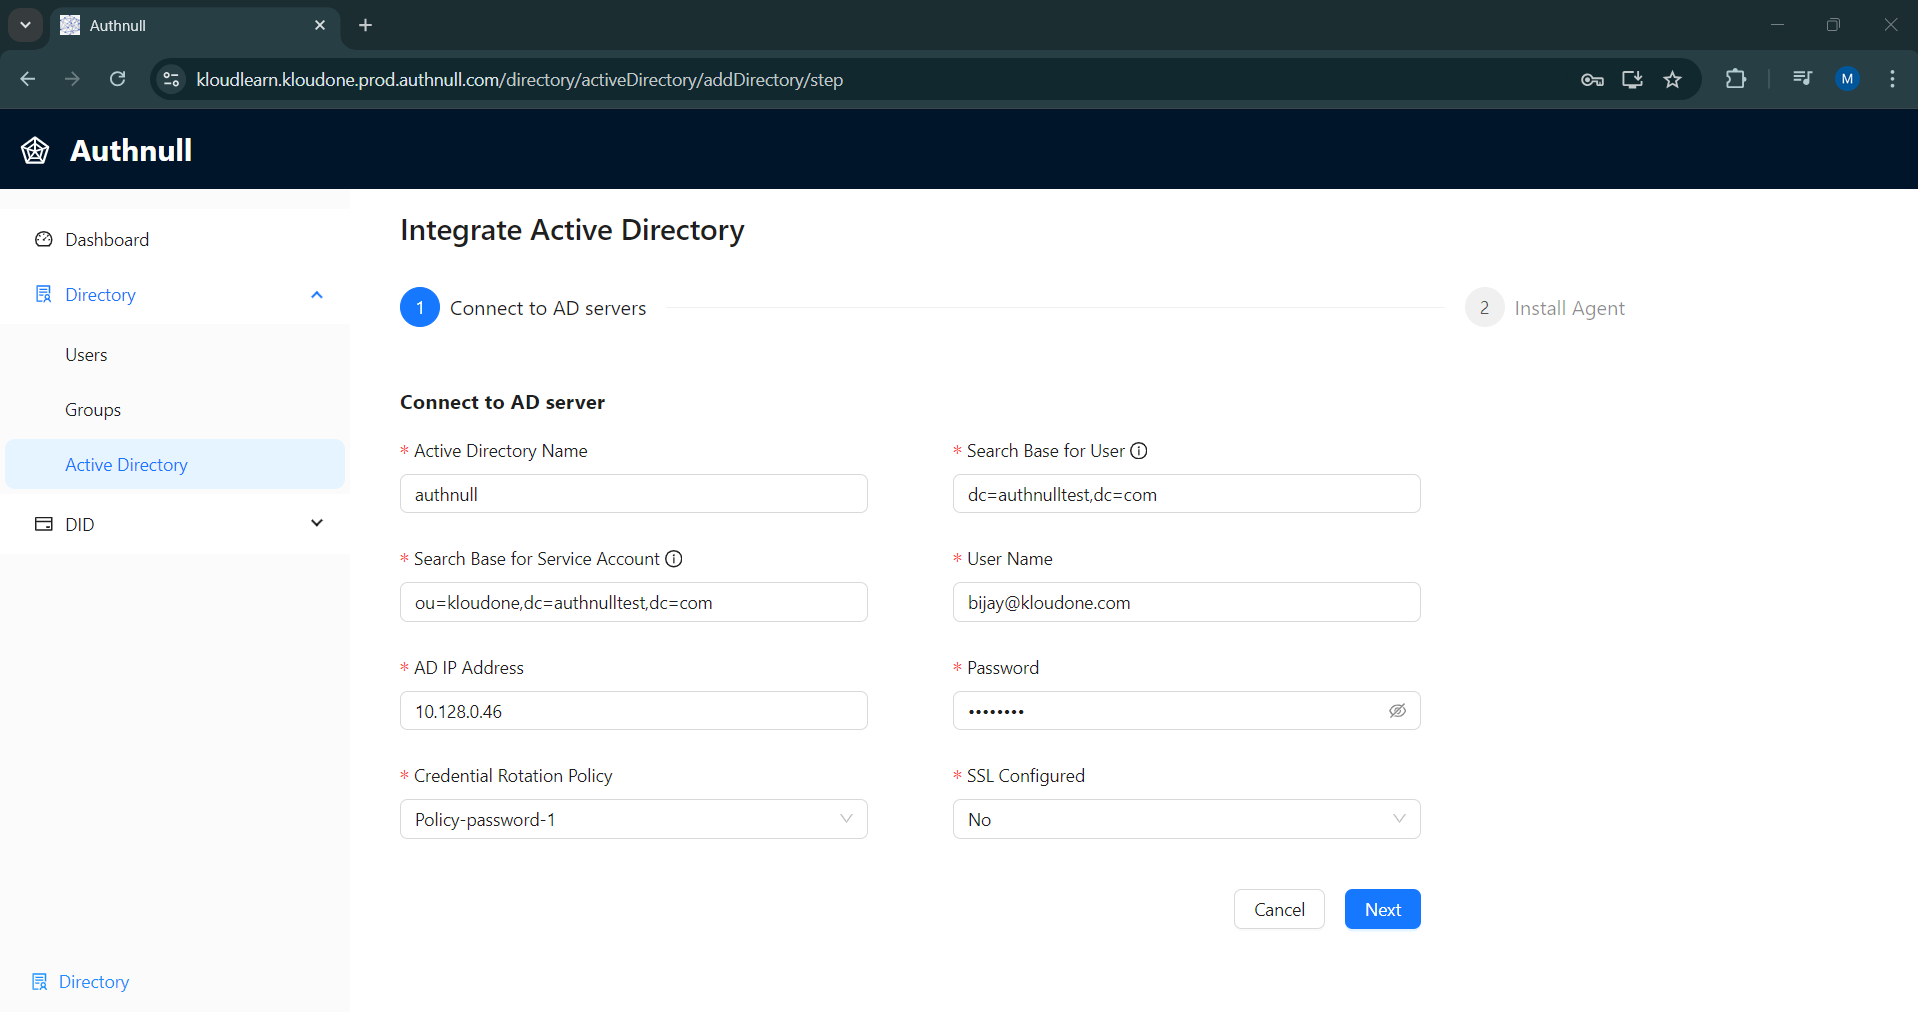
Entering Domain Details
- Provide your Active Directory domain name and server address. ![]
Configuring Synchronization Settings
- Specify synchronization settings for Groups and Users.
- Choose synchronization frequency and apply filtering criteria if needed.
Generating the Agent Key
- AuthNull will generate a unique agent key for this domain synchronization.
- Securely store this key; you’ll need it during agent installation.
Downloading the Agent Software
- After generating the agent key, download the AuthNull Active Directory Agent software.
4. Installation and Configuration
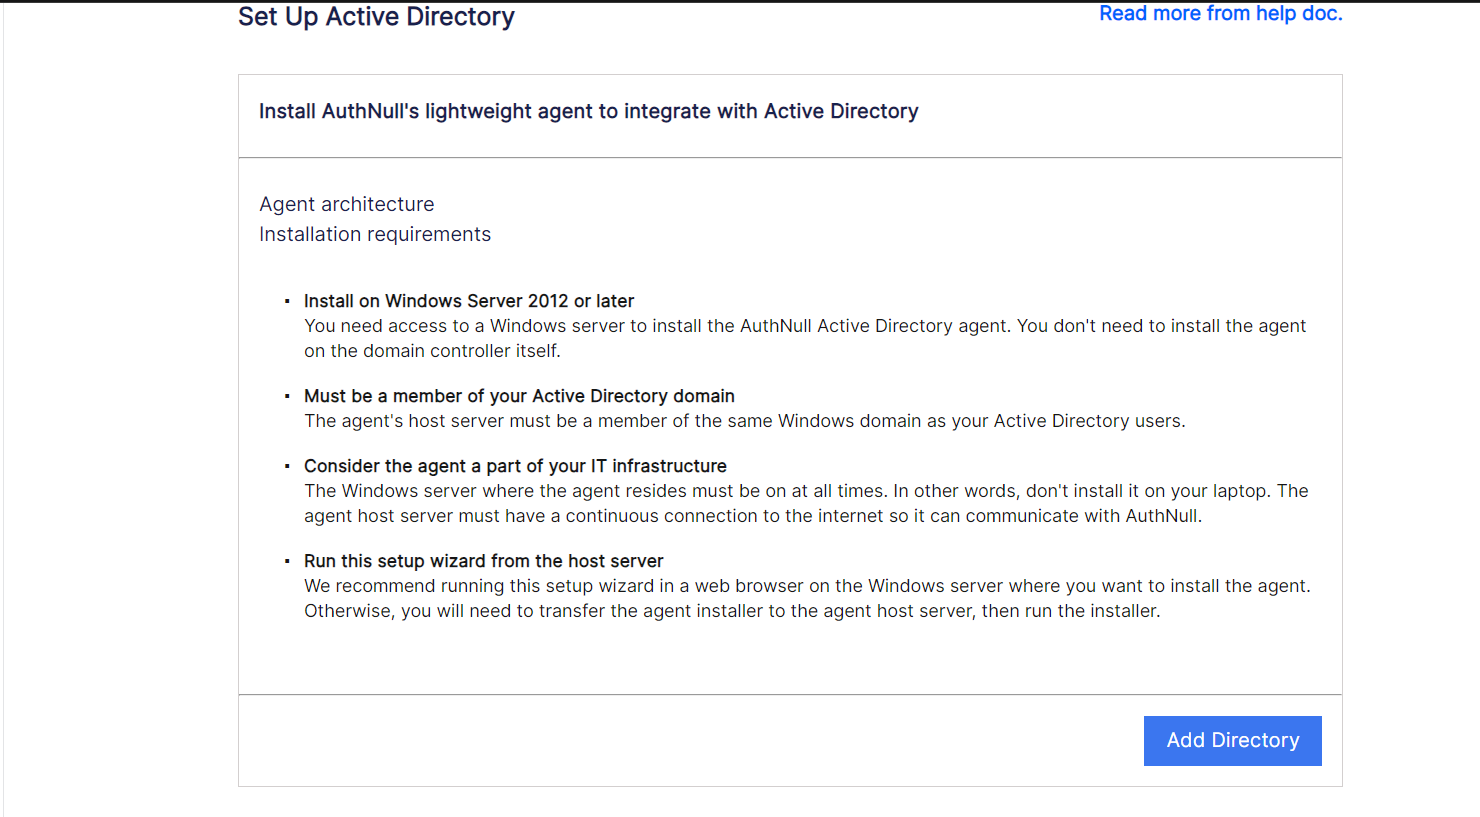
Installing the AuthNull Active Directory Agent
- Install the agent on a server within your network.
- Follow the installation instructions provided.
Providing the Agent Key
- During installation, you’ll be prompted to input the agent key generated earlier.
Completing the Installation
- Finish the installation process as prompted.
-
Fill up these fields to configure the AD server a. Select a domain user for the authnul AD Agent to run as: b. Select Create or use the account (recommended) . c. Account Name d. Password e. Proxy f. App Url g. API Key
- After filling up these fields click ‘Next’ to start the users & groups import. Once done configure the fields mappings.
5. Verification and Monitoring
Monitoring Synchronization
- Return to the AuthNull dashboard.
- Monitor the synchronization process under the ‘Active Directory Integration’ section.
- Ensure data is updated accurately and in real-time.
Verifying User Import and Delegated Authentication
- Confirm that user import is functioning as expected.
- Test delegated authentication to ensure a seamless user experience.
6. Troubleshooting
Refer to our troubleshooting section for solutions to common issues that may arise during the registration, configuration, or synchronization process.
For further assistance, contact our dedicated support team, who are ready to guide you through integrating the AuthNull Active Directory Agent into your privileged access management strategy.